
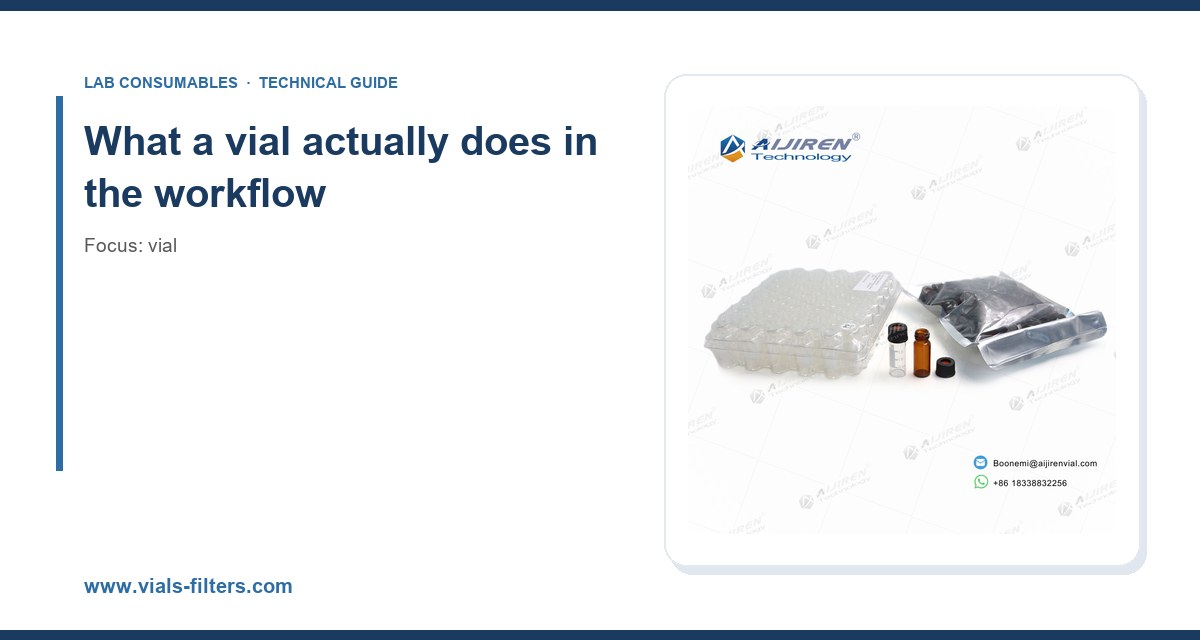
I have watched a lab buy 20,000 vials on price alone and then spend three weeks chasing a phantom baseline drift that turned out to be silicone oil leaching from a cheap cap septum. I have also watched a QC group pay triple for “certified” vials they did not need, when a standard Type I borosilicate vial with a proper PTFE-lined closure would have done the job. Picking a vial is not glamorous, but it touches every injection you run. Get it wrong and you will chase ghosts through the whole method. This guide is the checklist I wish someone had handed me fifteen years ago.
A vial is a container, a seal, and a sampling interface. That is the whole job. But each of those three functions fails in a different way, and each failure shows up in a different place on your chromatogram. Understanding which part is doing what keeps you from over-specifying one and under-specifying another.
The container sets the chemistry. Glass composition determines how much sodium, potassium, and boron can leach into your sample, and how much your sample can adsorb onto the wall. The seal sets the mass transfer. Septum material and thickness decide how much oxygen and moisture cross into the headspace, how much plasticizer comes out, and how many times you can puncture before the seal leaks. The sampling interface (neck geometry, crimp or screw, septa orientation) decides whether your autosampler needle goes where you think it goes.
Most of the problems I have investigated trace back to a mismatch in one of these three. A method validated on Type I glass and re-supplied with Type III glass will drift on trace metals. A method validated with a PTFE/silicone septum and re-supplied with a butyl septum will show siloxane peaks at m/z 73, 147, 207, 281 in GC-MS. A method validated with a 11 mm crimp cap and re-supplied with a 11 mm screw cap will show needle bending on the autosampler.
Glass: the first decision and the one most often skipped
Glass is not glass. The USP and the European Pharmacopoeia define four hydrolytic classes, and the difference between them is not academic.
Type I borosilicate
Type I is borosilicate 3.3, with a coefficient of linear expansion around 3.3 × 10⁻⁶ /K. It is the default for HPLC, LC-MS, GC, and any trace analysis where leaching matters. The surface is highly hydrolytically resistant. For trace metals work at ppb levels, this is what you buy. For pH-sensitive analytes and for anything stored more than a few hours before injection, this is also what you buy.
Type II treated soda-lime
Type II is soda-lime glass with a dealkalized surface layer. It is fine for buffered aqueous samples at neutral pH and short residence times. It is not fine for strongly alkaline samples, which will eat through the dealkalized layer and start leaching sodium and silicate. I have seen pH 10 buffers stored overnight in Type II vials show a visible haze by morning.
Type III soda-lime
Type III is plain soda-lime. It is the cheapest and the most common in low-cost vials. It is acceptable for non-critical work: general sample storage, waste collection, non-quantitative screening. It is a bad choice for trace metals, for ion chromatography, and for anything with a basic pH.
What the numbers look like
If you are running trace metals by ICP-MS at sub-ppb levels, the difference between Type I and Type III is roughly one to two orders of magnitude in sodium and boron background after 24 hours of contact. That is not a rounding error. That is a failed calibration curve. If you are running a 1 mg/mL standard in methanol for a GC-FID screen, the difference is invisible. Buy the glass your method actually needs, not the glass the catalog markets hardest.
Sizes: 2 mL is the default, but not the only answer
The standard autosampler vial is 12 × 32 mm with a 2 mL nominal capacity. That format fits almost every autosampler tray in the field: Agilent 7693 and 7697, Waters 2707, Shimadzu SIL-20 and Nexera, Thermo TriPlus and Vanquish, and the rest. If you are buying for a general-purpose HPLC or GC lab, this is the format you standardize on.
But “2 mL” is a nominal figure. The actual usable volume depends on the neck and the fill height. In a 12 × 32 mm vial with a 6 mm ID neck, you can safely fill to about 1.5 mL and stay below the septum. Fill to 1.8 mL and you will get a wet septum, and a wet septum on a GC autosampler is a needle that carries sample into the next injection.
When to size up or down
- 2 mL, 12 × 32 mm: standard HPLC and GC. The default.
- 1.5 mL, 11.6 × 32 mm: some older Agilent and Shimadzu trays. Check your tray dimensions before you buy.
- 4 mL, 15 × 45 mm: larger injections, sample prep with derivatization, some LC-MS workflows.
- 10 mL and 20 mL headspace: dedicated headspace vials with crimp or screw closures. If you are running headspace GC, do not try to force a 2 mL vial into a headspace tray. See the headspace vial range for the correct formats and crimp dimensions.
- Microvolume (300 µL and below): for limited-sample work such as protein digests and single-cell prep. The trade-off is that the autosampler needle has less room for error. A 300 µL vial with a 6 mm neck is not the place to learn needle alignment.
If you are buying for a mixed lab, standardize on 12 × 32 mm and buy one adapter kit for the odd tray. That is cheaper than carrying four formats in stock.
Closures: crimp, screw, or snap
The closure is where most operational pain lives. It is also where most buyers make their second-biggest mistake after glass type.
Crimp
Crimp closures give the best seal consistency when done right. The seal is set by the crimper, not by the operator’s wrist, so the compression is repeatable. For headspace GC, crimp is the standard because the seal must hold pressure at 80 to 150 °C for 20 to 40 minutes without leaking. A properly crimped 20 mm headspace cap on a 20 mL vial will hold 1.5 bar of headspace pressure without weeping.
The catch is the crimper. A worn or misadjusted crimper will produce caps that look fine and leak. I have seen 5 to 10% leak rates from a crimper that was 0.2 mm out of adjustment. Check your crimper every quarter with a torque or compression gauge, and replace the jaws when they show visible wear.
Screw thread
Screw caps are the operator-friendly choice. No tooling, no crimper maintenance, and re-openable. The trade-off is that seal consistency depends on how far the operator tightens. Too loose and the septum does not seal. Too tight and the septum deforms, coring becomes more likely, and the cap can crack.
The thread standards you will encounter are 9 mm (short thread, the most common for 12 × 32 mm autosampler vials), 10-425 (a wider format used on some 2 mL and 4 mL vials), and 13-425 and 15-425 for larger vials and reagent bottles. The GPI 9 mm short thread and GPI 13-425 references in catalogs refer to the Glass Packaging Institute thread specifications, and they are not interchangeable. If your method says 9 mm, a 10-425 cap will not fit.
For torque, the practical target for a 9 mm screw cap on a glass autosampler vial is 0.9 to 1.2 N·m. Hand-tight with a cap tool is usually in that range. A torque wrench will confirm it. Over-torque is more common than under-torque in my experience, and it is the leading cause of septum coring on screw-cap vials.
Snap
Snap caps are the fastest to apply and the least reliable for long-term storage. They are acceptable for short-run analytical work where the sample is injected within a few hours. They are a poor choice for overnight autosampler runs, for headspace, and for anything stored more than a day. The snap seal is mechanical, not compression-based, and it will relax.
Septum: the part everyone forgets and the part that ruins the run
The septum is a disc of elastomer, often laminated or faced with PTFE, that sits between the sample and the outside world. It has three jobs: seal, allow needle penetration, and reseal after withdrawal. Each job constrains the material choice.
Material comparison
- Silicone: excellent reseal, very high puncture count (50+ on a good 1 mm thick disc), but high gas permeability and a tendency to leach siloxanes. Bad for trace GC-MS. Fine for HPLC-UV.
- PTFE-faced silicone: the workhorse. The PTFE face gives chemical inertness and low extractables on the sample side; the silicone backing gives the reseal. This is the default for HPLC and for most LC-MS work. Puncture count is typically 20 to 30 before reseal degrades, depending on needle gauge.
- PTFE/silicone laminated: two PTFE faces with a silicone core. Better chemical resistance than single-faced, slightly worse reseal. Good for aggressive solvents.
- Butyl rubber: low gas permeability, good for headspace and for storage, but poor reseal after multiple punctures. Not for multi-injection autosampler runs.
- Bromobutyl: butyl with better heat resistance. Common in pharmaceutical headspace work where the method calls for it.
- Natural rubber: cheap, high extractables, high coring risk. Avoid for anything quantitative.
Thickness and needle gauge
Septum thickness matters more than most buyers realize. A 1.0 mm septum is the standard for 9 mm screw caps and 11 mm crimp caps. A 1.5 mm septum gives a better seal on headspace and on high-pressure applications, but it increases coring risk with a 22-gauge needle. If your autosampler uses a 22-gauge needle (0.72 mm OD), a 1.0 mm septum is the safer choice. If it uses a 26-gauge needle (0.46 mm OD), a 1.5 mm septum is fine and gives a better seal.
Coring is the failure mode to watch. A cored septum leaves a small plug of elastomer in the sample, and that plug will eventually reach the needle or the column. On a 9 mm screw cap, coring is almost always caused by over-torque or by a needle that is not centered on the septa. Check needle alignment every time you change a tray.
Headspace and GC-specific considerations
Headspace is its own discipline. The vial must hold pressure at temperature, the septum must not leak, and the sample must reach thermal equilibrium without adsorbing to the wall. If you are running headspace GC, the vial is not a container, it is a pressure vessel.
For headspace, use dedicated 20 mL vials with 20 mm crimp caps and 1.5 mm PTFE/silicone or butyl septa. Crimp, not screw, for the reasons above. The crimp compression target is roughly 0.3 to 0.5 mm of cap deformation, which you set with the crimper and verify visually. A properly crimped cap will show a uniform rolled edge; a bad crimp will show a tilted or partially rolled edge. If you see either, re-crimp before you load the tray.
For standard GC, the GC vial choice is usually a 2 mL 12 × 32 mm screw or crimp with a PTFE/silicone septum. The key GC-specific concern is siloxane background. If your method runs SIM at m/z 73, 147, 207, or 281, a low-bleed septum matters more than the glass type. Buy septa that are specified for GC-MS, and run a blank injection of a fresh vial with solvent before you trust a new lot.
Sample prep and storage: the reagent bottle question
Not every sample lives in an autosampler vial. If you are preparing standards, storing mobile phase, or holding a bulk sample before aliquoting, you want a reagent bottle with a GL45 or GL32 thread and a PP or PFA closure. The same glass-type rules apply: Type I for trace work, Type III for general. The closure rules are simpler because reagent bottles are not punctured, so septum choice drops out and chemical compatibility of the cap liner becomes the deciding factor. PTFE-faced liners are the safe default for organic solvents; silicone liners are fine for aqueous.
If you are buying vials across a mixed workflow, it helps to source from a supplier that carries the full chain. The vial range at vials-filters.com covers the autosampler and headspace formats; the reagent bottle and closure range covers the upstream prep.
Certifications: what you actually need
Vial catalogs are full of certification claims. Most buyers over-buy here. Here is what each certificate actually proves.
- Dimensionally certified: the vial meets the stated neck ID, height, and OD within tolerance. Worth paying for if you run a high-throughput autosampler and needle crashes are a cost. Typical tolerance is ±0.2 mm on OD and ±0.3 mm on height.
- LC-MS certified: the vial and closure have been tested for low extractables by LC-MS. Worth paying for if you run sub-ppb LC-MS. Not worth it for HPLC-UV.
- GC-MS certified: the septum has been tested for low siloxane bleed. Worth paying for if you run SIM at siloxane masses. Not worth it for GC-FID.
- ICP-MS certified: the glass has been tested for low trace-metal leaching. Worth paying for if you run trace metals. Not worth it for organics.
- Sterile / DNAse / RNAse free: only relevant for biological sample prep. Do not pay for it on a general chemistry vial.
The general rule: buy the certification that matches the detector. If your detector cannot see the contaminant, the certificate is a line item you do not need. If it can, the certificate is insurance.
Operational precautions that prevent most failures
Most vial failures are operator failures, not product failures. The list below is what I train new analysts on in their first week.
- Fill to 1.5 mL, not 1.8 mL, on a 2 mL vial. Wet septa cause carryover and coring.
- Check needle alignment after every tray change. A needle that is 0.5 mm off-center will core a septum within 20 injections.
- Torque 9 mm screw caps to 0.9 to 1.2 N·m. Hand-tight with a tool is usually right; a torque wrench confirms.
- Replace septa, not just vials, on reused caps. A reused septum has already lost reseal and is a leak waiting to happen.
- Run a solvent blank through a fresh vial from each new lot before you trust the lot. One injection is cheap; a failed batch is not.
- Store vials capped and upright, and do not store them in a tray on the autosampler overnight unless the method requires it. Septa relax under continuous needle contact.
- Check crimper adjustment quarterly with a compression gauge, and replace jaws at the first sign of wear.
- Match septum thickness to needle gauge: 1.0 mm for 22-gauge, 1.5 mm for 26-gauge.
A troubleshooting checklist
When a method goes sideways and the vial is a suspect, work through this in order. It saves time compared to replacing everything at once.
Symptom: baseline drift or rising noise over a run
Suspect septum bleed first. Run a blank injection of pure solvent in a fresh vial from a different lot. If the drift disappears, the septum is the cause. Switch to a GC-MS-certified septum or a PTFE-faced septum. If it persists, check the glass type: a Type III vial in a trace-metals method will leach sodium and boron, and the drift will be gradual.
Symptom: ghost peaks at m/z 73, 147, 207, 281
This is siloxane. The septum is the source in roughly nine cases out of ten. Replace with a low-bleed septum and re-run. If the peaks persist, check the septa on the inlet and the column, not just the vial.
Symptom: needle bending or autosampler crash
Check the vial dimensions against the tray spec. A 12 × 32 mm vial in a tray set for 11.6 × 32 mm will cause intermittent crashes. Check the cap height: an over-torqued screw cap sits higher than a properly torqued one, and the needle will hit the cap rather than the septum. Check needle alignment.
Symptom: leak during headspace run
Check the crimp first. A tilted or under-crimped cap is the most common cause. Re-crimp and re-run. If the leak persists, the septum is the suspect: a 1.0 mm septum at 120 °C for 30 minutes is at the edge of its capability. Move to 1.5 mm butyl or PTFE/silicone.
Symptom: carryover between injections
Check fill volume first. A wet septum carries sample into the next injection. Then check septum condition: a cored septum holds sample in the puncture. Then check the wash solvent: some methods need a stronger needle wash than the default.
Symptom: trace metal background rising
Check glass type. Type I is the answer for ICP-MS. Then check the closure: a metal cap with an exposed metal crimp ring can contribute. Then check the lab water and the acid, because the vial is often innocent.
Decision checklist: matching vial to method
This is the table I would put on the wall of a sample prep room. It maps the common method types to a concrete specification.
- HPLC-UV, general: 2 mL 12 × 32 mm, Type I glass, 9 mm screw, PTFE/silicone 1.0 mm septum. No certification needed.
- LC-MS, sub-ppb: 2 mL 12 × 32 mm, Type I glass, 9 mm screw, PTFE/silicone 1.0 mm septum, LC-MS certified. Add a solvent blank per lot.
- GC-FID, general: 2 mL 12 × 32 mm, Type I glass, 11 mm crimp or 9 mm screw, PTFE/silicone 1.0 mm septum.
- GC-MS, SIM at siloxane masses: 2 mL 12 × 32 mm, Type I glass, 11 mm crimp, low-bleed PTFE/silicone 1.0 mm septum, GC-MS certified.
- Headspace GC: 20 mL 23 × 75 mm, Type I glass, 20 mm crimp, 1.5 mm PTFE/silicone or butyl septum, crimper verified quarterly.
- Trace metals by ICP-MS: 15 mL or 50 mL centrifuge-style or 2 mL autosampler vial, Type I glass, ICP-MS certified, PTFE-lined closure.
- Ion chromatography: 2 mL 12 × 32 mm, Type I glass, 9 mm screw, PTFE/silicone 1.0 mm septum. Avoid Type III.
- Sample storage (short term): 2 mL 12 × 32 mm, Type I or II, 9 mm screw, PTFE/silicone 1.0 mm septum. Cap and store upright.
- Standard and mobile phase prep: reagent bottle, Type I glass, GL45 or GL32, PTFE-faced liner.
Where to look for specs and method references
Vial specifications should match the autosampler manufacturer’s tray dimensions. Agilent publishes tray and vial dimensions in its chromatography consumables documentation, and Thermo Fisher publishes the same for its sample handling hardware. If you are writing or validating a method that touches waste or environmental matrices, the U.S. EPA SW-846 methods specify vial and preservation requirements that will constrain your choice. For method development and troubleshooting, Restek’s technical resources are a good cross-check on septum bleed and injection port behavior.
Two standards worth knowing by name: USP <660> for glass containers and ISO 8362 for injection containers, both of which define the glass classes and test methods referenced above. The GPI thread specs (9 mm short thread, 13-425, 15-425) are what your cap catalog is actually referring to when it says “9 mm”.
Cost: where the money actually goes
A 2 mL Type I screw vial with a PTFE/silicone septum runs roughly $0.15 to $0.40 per unit in case quantities, depending on certification and cap style. A crimp version is similar. A headspace 20 mL vial with a 20 mm crimp cap runs $0.40 to $0.90. A certified LC-MS or GC-MS vial adds 20 to 60% to the unit price. A reagent bottle runs $3 to $15 depending on size and closure.
The cost that matters is not the unit price. It is the cost of a failed batch. A single re-run of a 96-well plate costs more in instrument time and analyst hours than a year’s supply of the upgrade that would have prevented it. Buy the glass and the septum your method needs, and do not pay for certifications your detector cannot see.
Takeaway
Choose the glass by the detector, the size by the tray, the closure by the workflow, and the septum by the needle and the temperature. Type I borosilicate for trace and for anything quantitative, Type II or III only for non-critical work. 12 × 32 mm 2 mL as the default, 20 mL 20 mm crimp for headspace, reagent bottles upstream. Torque 9 mm caps to 0.9 to 1.2 N·m, verify crimper adjustment quarterly, fill to 1.5 mL, and run a solvent blank through a fresh vial before you trust a new lot. Get those four decisions right and the vial stops being a variable in your method.
References & further reading
Related resources from our lab consumables network:
- Vial at vials-filters.com
- Headspace Vial at headspacevialsupplier.com
- Gc Vial at gcvialfactory.com
- Reagent Bottle at reagentbottleforsale.com
External references and standards: