
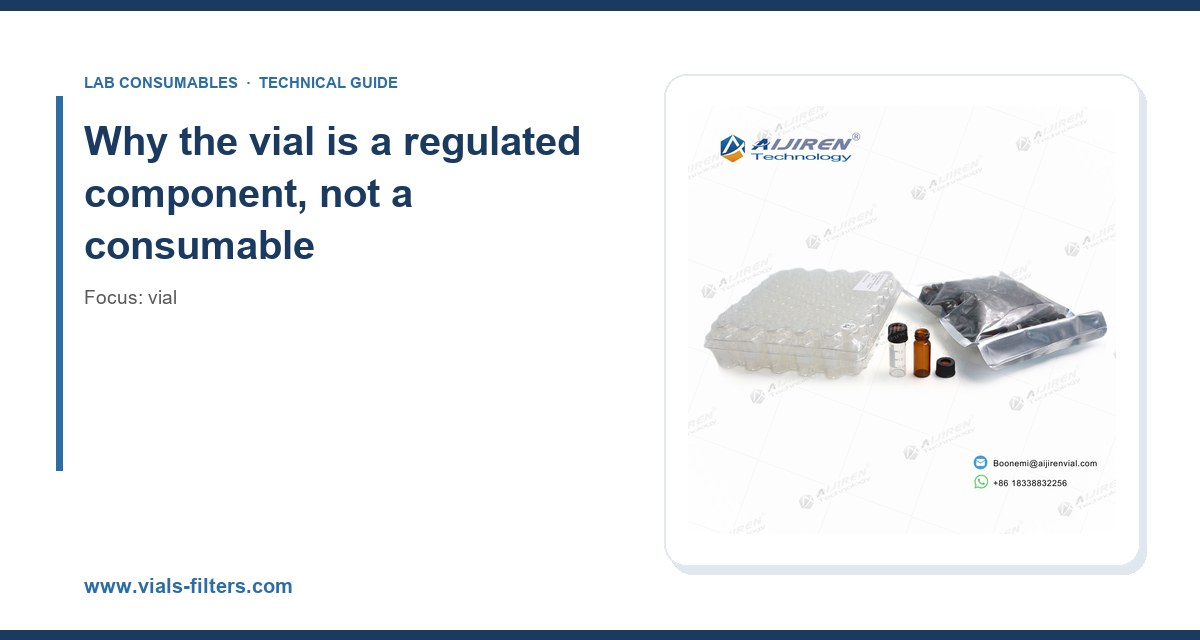
I lost a week of instrument time in 2019 to a vial. Not a column, not a detector lamp, not a bad injection. A vial. The method was EPA 8260C, the autosampler was a $90k liquid handler, and the 2 mL crimp-top vials we had switched to (to save four cents a unit) had a neck ID that ran 0.15 mm tight against the spec. The needle bent on every twentieth injection, the run aborted, and the sequence restarted from the beginning. Nobody in procurement believed the vial was the problem. It always is.
That experience is why I now treat the vial as a regulated component, not a commodity. In any method that lives under EPA SW-846, an ISO standard, or an AOAC Official Method, the vial is part of the analytical system. Its dimensions, its septa chemistry, its cleanliness, and its closure torque all affect whether your data will survive an audit. Here is what I have learned about specifying vials for methods that regulators actually read.
The phrase “regulated analytical method” means the method document specifies the sample container, or the validation data behind the method assumes a container of a defined type. EPA SW-846 methods are the clearest example. Method 5030 (purge and purge-and-trap), Method 5035 (closed-system purge-and-trap for soils), Method 8260 (volatile organics by GC-MS), and Method 8015 (nonhalogenated organics by GC-FID) all reference specific vial types, volumes, and septum materials. If your lab runs 8260C and you change from a 40 mL VOA vial with a PTFE-lined silicone septum to a 40 mL vial with a butyl septum, you have changed the method. Your data package now needs a documented equivalence study, or an auditor will write you up.
The same logic applies to U.S. EPA SW-846 test methods for waste and materials in general. SW-846 is not a single document. It is a living compendium of methods, each with its own sample handling requirements, and the container specification is part of the method. Method 3510 (separatory funnel liquid-liquid extraction) specifies a 2 L separatory funnel, but the extract is stored in a glass vial with a PTFE-lined cap. Method 3546 (microwave extraction) specifies a 100 mL extraction vessel, but again the extract goes into a defined vial. The vial is the last thing that touches the sample before the autosampler does, and the first thing an auditor asks about when recovery is low.
ISO methods are less prescriptive about the physical vial but more prescriptive about the material. ISO 5667 (water quality sampling) requires containers that do not adsorb or leach the analyte. ISO 17025 (general requirements for the competence of testing and calibration laboratories) requires that any equipment that affects the validity of results be calibrated and maintained. A vial that leaches plasticizer into a semivolatile extract affects the validity of the result. That is an ISO 17025 nonconformity waiting to happen.
AOAC Official Methods are the most forgiving on vial geometry and the least forgiving on cleanliness. AOAC methods for pesticide residues, mycotoxins, and food additives typically specify a “suitable vial” but require that the vial be demonstrated not to contribute interferences at the method detection limit. In practice, that means you need a certificate of analysis for extractables, or you need to run a method blank with the vial in the path.
Container specifications that methods actually call out
When I write a specification for a regulated method, I work from four numbers: volume, neck finish, septum chemistry, and closure torque. Get those four right and the vial disappears from your troubleshooting log. Get any one wrong and you will spend a month chasing a ghost.
Volume and fill level
Method 5035 is the strictest. It requires a closed-system vial, typically 40 mL, filled to leave a defined headspace. The method specifies a minimum 25 mL of sample in a 40 mL vial for high-concentration soils, and a 5 mL sample in a 40 mL vial for low-concentration soils with a preservative. Fill level matters because purge-and-trap efficiency depends on the ratio of headspace to sample volume. Overfill the vial and you get carryover. Underfill it and you get poor purge efficiency and low recovery. I have seen labs fail 5035 proficiency tests purely because a technician filled a 40 mL vial to the shoulder instead of the 25 mL mark.
For 2 mL autosampler vials, the fill level is less critical for the method and more critical for the autosampler. Most modern liquid handlers (Agilent 1260, Thermo Vanquish, Waters ACQUITY) draw from a needle that reaches within 1 mm of the bottom. Fill a 2 mL vial to 0.5 mL and the needle may aspirate air. Fill it to 1.8 mL and you risk the septum being wetted, which causes coring and needle damage. The sweet spot for a 2 mL vial with a 12 x 32 mm body is 1.0 to 1.5 mL. That is the number I put in every SOP.
Neck finish and GPI dimensions
This is where cheap vials fail. The Glass Packaging Institute (GPI) defines neck finishes for glass containers, and the relevant GPI finish for 2 mL autosampler vials is GPI 8-425 for 8 mm screw-thread vials and GPI 13-425 for 13 mm screw-thread vials. The first number is the nominal diameter in millimeters. The second is the thread pitch in threads per inch. A vial that claims to be “8 mm” but has a thread pitch of 400 instead of 425 will not seal on a standard cap. It will cross-thread, and cross-threading is the number one cause of autosampler crashes in my experience.
For crimp-top vials, the relevant dimension is the crimp neck OD. A standard 11 mm crimp vial has a neck OD of 11.0 mm plus or minus 0.2 mm. A standard 20 mm crimp vial (used for headspace and for 40 mL VOA vials) has a neck OD of 20.0 mm plus or minus 0.3 mm. If the neck OD runs large, the crimper will not seat the seal. If it runs small, the seal will be loose and the vial will leak during headspace equilibration. I specify a tolerance of plus or minus 0.15 mm on neck OD for any vial used in a regulated method, and I ask for a dimensional certificate with the lot.
If you are sourcing vials for a method that references headspace, the headspace vial you choose needs to match the crimper and the sampler. A 20 mm crimp vial from one supplier may not seal on a crimper set up for another supplier’s neck OD. I have seen a 0.2 mm difference cause a 30% leak rate on a PerkinElmer TurboMatrix. The fix was not a new crimper. It was a new vial supplier.
Septum chemistry
The septum is the most under-specified component in most labs. It is also the one that causes the most silent failures. Here is the decision matrix I use:
- PTFE-faced silicone (red/white): the default for volatile organics by GC. The PTFE face is inert to most solvents and prevents the silicone from bleeding into the sample. Temperature rating is typically -40 to 200 degrees C. Puncture count before coring is 2 to 3 for a 23-gauge needle. This is the septum for EPA 8260, 624, and 524.2.
- Pure PTFE (uncured): the most inert, but it does not reseal. Use it for single-injection methods where carryover is the primary concern, not for multi-injection sequences. Temperature rating -60 to 260 degrees C.
- Silicone with a PTFE liner and a molded injection port: the standard for HPLC autosamplers. The molded port guides the needle and extends puncture count to 5 to 10. Temperature rating is lower, typically -40 to 120 degrees C.
- Butyl rubber: high gas barrier, low bleed, but poor solvent resistance. Use it for headspace vials that will sit for days before analysis, not for direct injection of chlorinated solvents.
- Bonded septa: the PTFE face is bonded to the silicone rather than laid on top. This eliminates the delamination failure mode where the PTFE face peels off after repeated puncture. Worth the extra cost for any method with more than 50 injections per vial.
The failure mode I see most is a technician reusing a septum after a single injection “because the vial is still full.” A PTFE-faced silicone septum that has been punctured once has a needle track that will not reseal. The next injection will draw headspace air, and the internal standard response will drift. In a regulated method, that is a data integrity issue, not a convenience issue. Cap the vial once, inject once, discard.
Closure torque
For screw-thread vials, torque is the variable nobody measures. The GPI specification for an 8-425 screw cap calls for a torque of 0.5 to 1.0 inch-pounds (roughly 0.06 to 0.11 newton-meters). For a 13-425 cap, the range is 1.0 to 2.0 inch-pounds. For a 20 mm crimp cap, there is no torque because the seal is formed by the crimper, but the crimper itself should be set to a crimp height of 7.0 to 7.5 mm for a 20 mm vial and checked with a crimp gauge every shift.
Over-torque is the common error. A technician with strong hands can easily hit 3 inch-pounds on an 8-425 cap, which deforms the septum, cracks the plastic cap, and creates a leak path. Under-torque is subtler: the cap looks tight but the septum is not compressed, and the vial evaporates during a 24-hour autosampler run. I keep a torque wrench on every prep bench and require a torque check at the start of every shift. That single practice cut our headspace leak rate from 8% to under 1% in one quarter.
Cleanliness and extractables: the silent failure mode
Regulated methods live or die on method blanks. A method blank that shows a phthalate peak at 0.5 ppb when your reporting limit is 1 ppb is a fail. And in my experience, the phthalate is coming from the vial, not the solvent.
Glass vials are manufactured with mold-release agents, and the caps are manufactured with plasticizers (DEHP, DINP) and lubricants. A “clean” vial straight from the box can contribute 0.1 to 2.0 ppb of phthalates to a 40 mL extract. For semivolatile methods (EPA 8270, 625), that is enough to fail a blank. For pesticide methods (EPA 8081, 8141), the plasticizer can co-elute with the target analyte.
The fix is to specify vials that have been kiln-fired at 450 degrees C for at least 4 hours or solvent-rinsed and certified for extractables. I ask for a certificate of analysis that lists the extractable residue at a stated detection limit, and I run an incoming lot blank on every new case. For the vial itself, the specification should include the glass type (Type I borosilicate, USP Type I, or ASTM E438 Type I), the firing temperature, and the residual extractables limit. A vial without that certificate is a vial you cannot defend in an audit.
For GC vial applications, the cleanliness requirement is even tighter because the injection volume is small (1 microliter) and the split ratio concentrates any contaminant. A 1 ppb phthalate in the vial becomes a 10 ppb peak on the column at a 10:1 split. I have seen a single lot of uncleaned vials fail an entire 8270 sequence.
Autosampler compatibility: the numbers that matter
The vial has to fit the autosampler, and the autosampler has to fit the vial. This sounds obvious. It is the source of more downtime than any other single issue in my experience. Here is the compatibility table I keep on the wall:
- Agilent 7693A / 7683B (GC liquid injection): 2 mL, 11 mm crimp or 8-425 screw, 12 x 32 mm body. Maximum cap height 6.0 mm. Needle gauge 23. Septum must be PTFE-faced silicone.
- Agilent 7697A (headspace): 20 mL, 20 mm crimp, 22.5 x 75 mm body. Crimp height 7.0 to 7.5 mm. Septum must be PTFE-faced silicone or butyl.
- Thermo TriPlus RSH (GC): 2 mL, 11 mm crimp or 9 mm screw, 12 x 32 mm body. Maximum cap height 6.5 mm.
- Thermo Vanquish / Ultimate 3000 (HPLC): 2 mL, 9 mm screw or 11 mm crimp, 12 x 32 mm body. Maximum cap height 6.0 mm. Septum must be silicone with PTFE liner.
- Waters ACQUITY / Alliance (HPLC): 2 mL, 12 x 32 mm body. Maximum cap height 5.5 mm. This is the tightest tolerance in the industry, and a 6.0 mm cap will crash the needle.
- PerkinElmer TurboMatrix (headspace): 22 mL, 20 mm crimp, 23 x 75 mm body. Crimp height 7.0 to 7.5 mm.
The references for these dimensions are in the instrument manuals, but the practical numbers come from the Agilent chromatography consumables and columns catalog and the Thermo Fisher chromatography and sample handling catalog. I keep both on my desk. When a new instrument arrives, I measure the vial nest with calipers before I order a single case of vials. That 10-minute measurement has saved me more than one $5,000 needle assembly.
If you are running a method that specifies a 2 mL vial and you are tempted to substitute a 1.5 mL wide-mouth vial to save shelf space, measure the cap height first. A 1.5 mL vial with a 9 mm screw cap often has a cap height of 6.5 mm, which will not clear a Waters ACQUITY needle. The vial will fit in the nest. The needle will hit the cap. The run will abort.
Sample preservation and holding times
Regulated methods specify holding times, and the vial is the container that enforces them. EPA 8260 requires that aqueous samples be preserved with HCl to pH less than 2 and held at 4 degrees C for no more than 14 days from collection to analysis. EPA 8270 requires that semivolatile samples be held at 4 degrees C for no more than 7 days to extraction and 40 days from extraction to analysis. If the vial leaks, the sample evaporates, the concentration increases, and the holding time is meaningless because the sample is no longer representative.
For headspace methods, the vial is also the equilibration chamber. Method 5021 (static headspace) requires that the vial be equilibrated at a defined temperature (typically 60 to 90 degrees C) for a defined time (typically 30 to 60 minutes). A vial with a loose crimp will leak during equilibration, and the headspace concentration will be low. The result is a false negative. I have seen a leaking crimp cause a 40% low bias on a 5021 run, and the technician blamed the standard.
For soil samples under Method 5035, the vial is the preservation container. The method requires that the sample be preserved with methanol or sodium bisulfate within 48 hours of collection, and that the vial be sealed with a PTFE-lined septum. A vial that is not sealed properly will lose the volatile analytes within hours. The vial is not a container in 5035. It is the method.
Documentation and audit trail
An auditor does not care that your vials are “high quality.” An auditor cares that you can trace the vial lot to the certificate of analysis, the certificate to the specification, and the specification to the method. That is the chain of custody for a consumable, and it is the chain that most labs break.
What I require in a vial specification for a regulated method:
- Lot number on the case and on the certificate of analysis.
- Glass type (Type I borosilicate, USP Type I, ASTM E438 Type I) and firing temperature.
- Dimensional certificate for neck OD, body OD, height, and cap height, with tolerances.
- Septum certificate for material, temperature rating, and extractables.
- Residual extractables at a stated detection limit (typically 0.1 ppb for phthalates).
- Closure torque recommendation and a torque wrench calibration record.
- Compatibility statement for the specific autosampler model in the method.
If a supplier cannot provide that package, the vial is not qualified for the method. It is qualified for a research lab, not a regulated one. I have walked away from suppliers who could not produce a dimensional certificate. The four cents per unit I saved was not worth the audit finding.
Troubleshooting checklist
When a regulated method fails, the vial is one of five suspects (the others are the column, the standard, the instrument, and the analyst). Here is the checklist I run before I touch the instrument:
- Check the method blank. If the blank shows a phthalate or a siloxane peak, the vial or septum is the source. Replace the lot and rerun.
- Check the internal standard response. A drift of more than 20% RSD across a sequence points to a leaking septum or a loose cap.
- Measure the cap height. If it is more than 0.5 mm over the autosampler specification, the needle will eventually hit the cap. Replace the lot.
- Check the crimp height. A 20 mm crimp that measures less than 7.0 mm or more than 7.5 mm will leak. Recalibrate the crimper.
- Check the torque. An 8-425 cap that measures more than 1.5 inch-pounds is over-torqued. An under-torqued cap will evaporate. Use a torque wrench.
- Check the septum puncture count. A septum that has been punctured more than 3 times is a coring risk. Cap once, inject once.
- Check the fill level. A 2 mL vial filled to less than 0.5 mL will aspirate air. A 40 mL VOA vial filled to less than 25 mL will fail 5035.
- Check the lot certificate. If the certificate is missing or the lot does not match, the data package is not defensible.
For a deeper technical reference on septa and vial compatibility, the Restek technical resources for chromatography are the best free source I know. Their septum selection guide is more detailed than most instrument manuals.
Recommendation: a concrete specification for a regulated method
Here is the specification I would write for a lab running EPA 8260C and 8270E on a modern GC-MS with a liquid autosampler. It is the specification I have used, and it has survived three audits without a vial-related finding.
- Vial body: 2 mL, 12 x 32 mm, Type I borosilicate glass, USP Type I, kiln-fired at 450 degrees C for 4 hours, residual extractables less than 0.1 ppb phthalates.
- Neck finish: 8-425 screw thread (GPI 8-425) or 11 mm crimp, neck OD 11.0 mm plus or minus 0.15 mm.
- Cap height: 6.0 mm maximum for Agilent and Thermo; 5.5 mm maximum for Waters.
- Septum: PTFE-faced silicone, bonded, temperature rated -40 to 200 degrees C, puncture count 2 to 3, certificate of extractables included.
- Closure torque: 0.5 to 1.0 inch-pounds for 8-425 screw caps; crimp height 7.0 to 7.5 mm for 20 mm crimp caps.
- Documentation: lot number, dimensional certificate, septum certificate, extractables certificate, autosampler compatibility statement.
- Holding time: 14 days for 8260 aqueous, 7 days to extraction for 8270, 40 days from extraction to analysis.
For a headspace method (EPA 5021 or 8260 with headspace), substitute a 20 mL, 22.5 x 75 mm, 20 mm crimp vial with a PTFE-faced silicone septum, crimp height 7.0 to 7.5 mm, and a butyl septum option for samples that will sit more than 48 hours. For a semivolatile method that needs a larger extract volume, use a 40 mL VOA vial with a 24 mm screw cap and a PTFE-lined silicone septum, torque 1.0 to 2.0 inch-pounds. If you are storing the extract for more than a week, use a reagent bottle with a PTFE-lined cap rather than a vial, because the larger headspace reduces the evaporation rate and the cap seal is more reliable over long holding times.
None of these numbers are exotic. They are in the GPI standards, the instrument manuals, and the method documents. The problem is that most labs do not write them down, and the supplier does not volunteer them. Write the specification, require the certificate, and measure the lot on arrival. That is the whole job.
Takeaway
In a regulated analytical method, the vial is not a consumable you buy on price. It is a component with a defined geometry, a defined chemistry, and a defined documentation trail. The four numbers that matter are volume, neck finish, septum chemistry, and closure torque. Get those right, require a certificate of analysis, and measure the lot on arrival. If you cannot trace the vial to the method, you cannot defend the data. The vial is the cheapest part of the analysis and the most expensive one to get wrong.
References & further reading
Related resources from our lab consumables network:
- Vial at vials-filters.com
- Headspace Vial at headspacevialsupplier.com
- Gc Vial at gcvialfactory.com
- Reagent Bottle at reagentbottleforsale.com
External references and standards: